Comprehensive Guide to Changing Brake Pads
Hey there, car enthusiasts and DIYers! Are you ready to dive into the world of brake maintenance?
We’ve got just the guide you need to help you conquer the task of changing brake pads like a pro. Say hello to some hands-on automotive action!
In this step-by-step tutorial, we’ll walk you through the process of swapping out those worn-out brake pads with confidence and a touch of grease. So roll up your sleeves, grab your tools, and let’s get down to business. By the end of this guide, you’ll be well-equipped to tackle this essential car maintenance task and ensure your brakes are in tip-top shape.
No need to be intimidated—we’ve simplified the instructions, and sprinkled in some insider tips to make it a breeze for even the novice DIYer. So let’s rev up those engines and embark on this brake pad replacement adventure together!
Disclaimer: Remember, safety comes first. If you’re unsure or uncomfortable with any step of the process, it’s always wise to seek professional assistance.
Step 1: Gather the Necessary Tools and Materials for Brake Pad Replacement
- Explore the list of essential tools and materials required, including new brake pads, a torque wrench, jack, jack stands, C-clamp or brake piston tool, brake cleaner, wire brush, and safety gear.
Step 2: Prepare Your Vehicle for Brake Pad Replacement
- Follow proper vehicle preparation procedures, such as parking on a level surface and engaging the parking brake, as well as loosening the wheel nuts of the specific wheel requiring brake pad replacement.
Step 3: Lift Your Vehicle Safely
- Use a jack to carefully lift your vehicle off the ground, ensuring stability and safety by securing it with reliable jack stands.
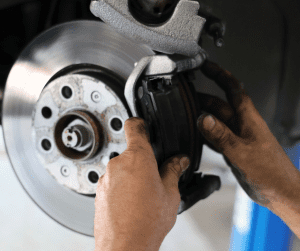
Step 4: Remove the Old Brake Pads
- Step-by-step instructions to remove the wheel nuts, take off the wheel, locate the brake calliper, detach it from the brake disc by removing bolts or pins, and lift the calliper away, revealing the old brake pads. Emphasize the importance of noting the correct positioning and orientation of the brake pads during removal.
Step 5: Replace the Brake Pads
- Thoroughly inspect the brake disc for signs of damage or excessive wear, providing insights on resurfacing or replacing the disc if necessary. Guide readers through removing the old brake pads, and cleaning the calliper, brackets, and brake disc using brake cleaner and a wire brush. Install the new brake pads, ensure proper orientation, and apply brake pad lubricant to minimize noise and vibration.
Step 6: Reassemble the Brake System
- Detailed instructions on placing the calliper back over the brake disc, aligning the bolt/pinholes, and securely fastening the bolts/pins. Emphasize the need to double-check brake pad positioning and alignment.
Step 7: Reinstall the Wheel
- Step-by-step guidance on placing the wheel back onto the wheel hub, hand-tightening the wheel nuts, lowering the vehicle carefully, and using a torque wrench to tighten the wheel nuts to the manufacturer’s specifications.
Step 8: Test the Brakes
- Highlight the importance of testing the brakes before driving. Instruct readers to pump the brake pedal to restore brake pressure, start the vehicle, apply gentle pressure to ensure proper engagement, and listen for any unusual noises or vibrations. Encourage a short test drive at low speeds to confirm optimal brake functionality.
Conclusion: By following our comprehensive guide, you can successfully change brake pads on your vehicle, ensuring safety and reliable brake performance. However, always consult your vehicle’s manual for specific instructions and torque specifications. If you’re uncertain or uncomfortable with the process, it’s best to seek assistance from a professional mechanic.
Our Location
Find Us
Unit 17 Norton Canes Business Park
Norton Green Lane
Norton Canes, Cannock
Staffordshire
WS11 9SS
01543 27 60 60
Opening Times
| Monday | 08:00 - 17:00 |
|---|---|
| Tuesday | 08:00 - 17:00 |
| Wednesday | 08:00 - 17:00 |
| Thursday | 08:00 - 17:00 |
| Friday | 08:00 - 17:00 |
| Saturday | By Appointment |
| Sunday | Closed |


© Car Friend - 2024
